

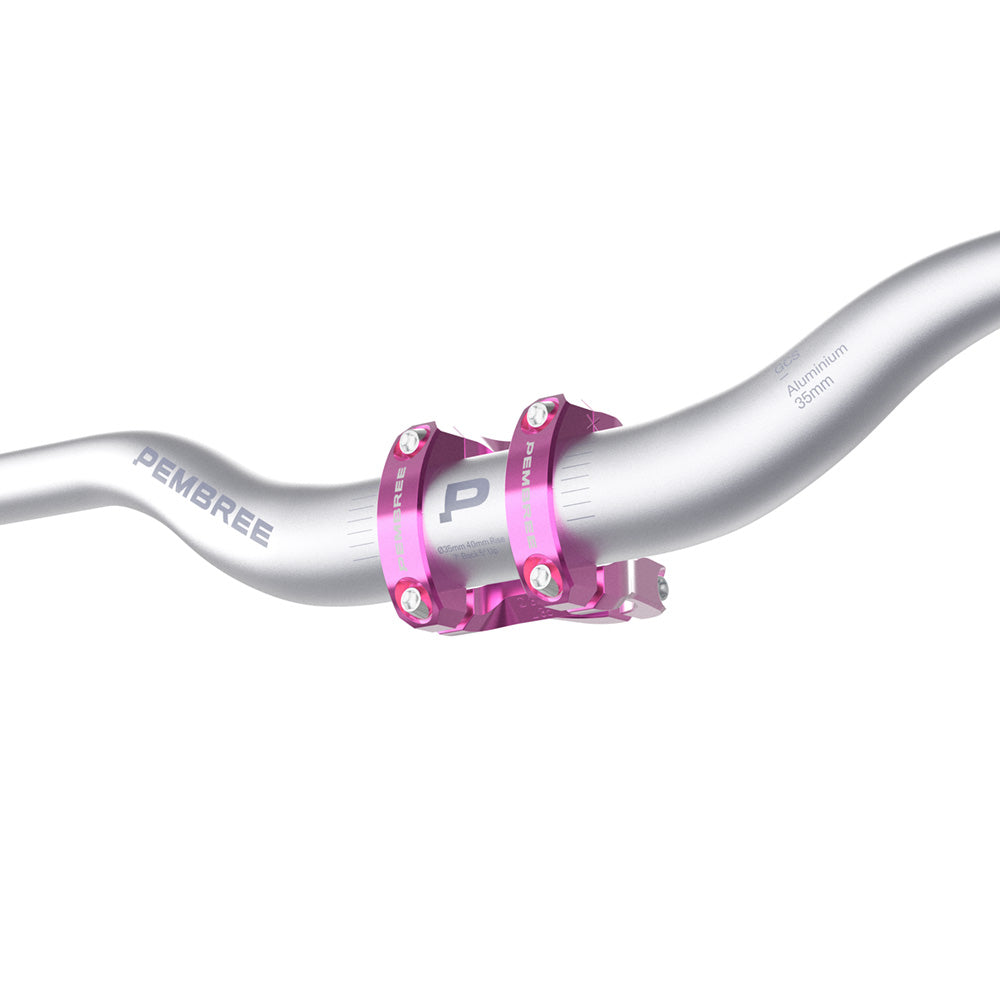
Mountain bike cockpit setup.
How to dial in your stem, handlebars and grips for a comfortable, controlled mountain bike.

The cockpit is where a mountain bike turns from a collection of measurements into something the rider can actually control. The stem fixes the handlebar in relation to the steering axis. The handlebar determines the width, height and angle of the rider’s hands. The grips create the final contact surface between hands and bike.
Those three parts work as a system. A bar that feels too low may not require a different frame; a change in spacer position, bar rise or bar roll may be enough. Hand or wrist discomfort might come from grip diameter, but it can also be caused by excessive handlebar width or unsuitable sweep. Steering that feels nervous or vague may be influenced by stem length, yet tyre pressure, suspension setup and rider position remain part of the picture.
The useful question is therefore not “What is the best cockpit setup?” It is “What position allows this rider to stay relaxed, move freely and load the front tyre deliberately on this bike?”
Three components. One hand position.


Start with the rider’s position, not the component catalogue
A good cockpit should let the rider maintain a strong but unforced position. When standing in a neutral riding stance, elbows should have room to bend, shoulders should not feel pulled excessively wide and the wrists should remain reasonably straight rather than sharply flexed. The rider needs enough space to move forward when loading the front tyre and enough freedom to shift rearward on steep terrain.
Cockpit setup changes the position of the hands, but it does not alter the frame’s published reach or stack. Reach and stack are fixed frame measurements. Stem length, spacers, bar rise, sweep and roll determine where the grips sit beyond those reference points—and therefore how the frame dimensions feel to the rider.
Before changing parts, record the existing setup. Note the number and position of headset spacers, stem length and rise, handlebar width and rise, the bar’s rotational position, grip diameter and the angle and reach of the brake levers. A photograph of the handlebar markings and controls is useful. Without a baseline, it is easy to make several changes and lose track of which one helped.
The stem: the cockpit’s central connection
Stem length
Stem length is normally measured from the centre of the steerer clamp to the centre of the handlebar clamp. It changes where the handlebar sits relative to the steering axis and influences both fit and steering feel.
A longer stem places the hands farther forward. Depending on the bike and rider, that can create more room and make it easier to place weight over the front tyre. It also increases the arc through which the hands move around the steerer. A shorter stem brings the hands closer to the steering axis and can make steering inputs feel more immediate, while supporting the compact cockpit position used by many modern trail, enduro and downhill bikes.
Neither direction is automatically better. Fitting an extremely short stem to a frame with insufficient reach may leave the rider cramped, while using a long stem to rescue an oversized or poorly matched frame can restrict movement and alter the balance the bike was designed around. Stem length should be considered alongside frame reach, handlebar sweep and the intended riding position.
The PEMBREE GCS mountain bike stem provides a gravity-focused example: it uses a compact 35 mm length, 40 mm stack and zero-degree rise. That geometry is intended for downhill, freeride and enduro cockpits, but the correct choice still depends on the bike’s frame dimensions and the rider using it.
How stem length is measured
Stem length runs from the centre of the steerer clamp to the centre of the handlebar clamp.

Stem height, rise and headset spacers
Moving spacers below the stem raises the cockpit. Because the steerer is angled, this also moves the stem slightly rearward. Moving spacers above the stem lowers the cockpit and moves the bar slightly forward. A positive-rise stem adds height; a negative-rise arrangement lowers the bar.
A higher hand position can make it easier to stay centred on steep descents and may give the rider more room to move behind the bike. Too high, however, and it can become difficult to apply useful pressure through the front tyre on flatter turns and climbs. A lower position may support an aggressive climbing or cornering stance, but excessive drop can load the hands, close the hip angle or make steep terrain feel intimidating.
Spacer changes must remain within the limits specified by the fork, headset and stem manufacturers. The stem also requires enough steerer engagement for its complete clamp area. The top-cap bolt is used to set headset bearing preload; it is not what ultimately holds the stem in line with the wheel. Once preload is correct, the stem’s steerer-clamp bolts secure the assembly.
Clamp diameter and installation
The stem and handlebar clamp diameters must match exactly. The common modern mountain bike sizes are 31.8 mm and 35 mm, but the marking on the actual components is the authority. A 31.8 mm bar must not be forced into a 35 mm stem or improvised with an unapproved arrangement.
Handlebar and stem manufacturers may specify a tightening sequence, an even faceplate gap or a deliberately closed gap on one side. Use a calibrated torque wrench and follow the instructions for both components. If their clamp-width or torque requirements are incompatible—particularly when a carbon handlebar is involved—do not assume that tightening to a compromise figure makes the combination safe.
Handlebars: width, height and hand angle
Width
Handlebar width changes leverage, upper-body position and clearance. A wider bar gives the rider more leverage over the steering and can create a stable stance on steep or rough ground. If it is too wide for the rider, it may lock the elbows, pull the torso forward, make it harder to move dynamically and contribute to shoulder or wrist discomfort.
A narrower bar can feel easier to place through tight turns and creates more clearance between trees. Taken too far, it reduces leverage and can make the cockpit feel cramped. Rider height and shoulder width are useful starting clues, not sizing formulas. Arm length, bike geometry, terrain and personal technique also matter.
Test a narrower hand position before cutting. Move the controls inward and ride with the hands slightly inboard, provided the grip and control arrangement remains safe. If trimming is appropriate, remove small and equal amounts from both ends, stay within the manufacturer’s marked limits and reinstall proper bar-end plugs. Cutting is permanent.
The PEMBREE GCS mountain bike handlebars are supplied at 800 mm and include markings that allow them to be reduced symmetrically within their approved range. That gives the rider a broad starting point without suggesting that full width is correct for everyone.
The dimensions that place your hands

Rise
Handlebar rise is the vertical difference between the centre clamp and the grip area. More rise raises the hands without adding more headset spacers. Less rise keeps the grips closer to the stem’s height.
Rise and cockpit height are related but not identical. Two bars with the same stated rise can position the hands differently because of their sweep, roll and shape. The final position also depends on stem height and frame stack. This is why replacing a bar should be treated as a geometry change at the contact points, not simply a choice between two numbers.
The GCS handlebar is offered with 20 mm or 40 mm rise, alongside 31.8 mm and 35 mm clamp options. Both versions use the same 7° backsweep and 5° upsweep, so the rise can be selected without changing those principal hand angles.
Lower and higher rise

Backsweep, upsweep and bar roll
Backsweep angles the grips towards the rider. Upsweep angles them upward. Together they influence wrist alignment, elbow position and the effective reach to the grips.
Bar roll changes how the designed rise and sweep are presented. Rolling a riser bar forward generally moves the grips forward and rotates their angle in the hands. Rolling it rearward usually brings the grips closer and changes the wrist position in the opposite direction. Excessive rotation can turn a sensible bar shape into an uncomfortable one.
Begin with the manufacturer’s neutral markings centred in the stem. Stand on the bike in a normal riding stance and look for a natural wrist line. Make small changes, mark the starting position and test on familiar terrain. Bar roll is a fine adjustment, not a substitute for the correct bar rise or frame size.

Sweep and rise are designed together.
Stated numbers are useful, but the complete bend determines where the grips sit. Start at the neutral centre markings and use small roll changes only after the broad height and width are sensible.
Grips: the smallest component with a large effect
Grips are often treated as a finishing detail, yet they affect comfort, security and how clearly the rider feels the front wheel. Diameter, rubber compound, texture, shape and clamp design all matter.
Diameter and hand support
A thinner grip allows more finger wrap and can feel precise, particularly for riders with smaller hands. If it is too thin, the rider may squeeze unnecessarily or feel pressure concentrated through the palm. A thicker grip increases the diameter under the hand and may reduce pressure for some riders, but too much material can make the brake lever harder to reach and reduce finger wrap.
There is no reliable rule that assigns a grip diameter from glove size alone. Hand shape, braking setup and preference all contribute. The PEMBREE GCS mountain bike grips are offered in 31 mm and 34 mm diameters, giving riders a meaningful thin-or-thick choice.

What the hand actually feels
Compound, texture and rotation
A softer compound can feel tacky and reduce the force needed to hold the bar, although wear rate and feel vary between designs. Texture should support the palm and fingers without creating pressure points. Directional ribs or blades need to be rotated into the position intended by the manufacturer; turning a grip randomly can put its supportive surface in the wrong place.
Lock-on grips must be fully seated, aligned and tightened to their specified torque. More torque is not more security: overtightening can damage the clamp, grip core or handlebar. The bar ends must remain covered by intact grip ends or plugs, since exposed handlebar ends present a serious injury risk in a crash.
Controls complete the cockpit
Stem, handlebar and grips establish the hand position, but brake levers and shifters determine whether the rider can use it effectively.
Set brake-lever reach so the index finger can contact the useful part of the blade without the hand rotating around the grip. With the rider in a neutral stance, the index finger and lower arm should form a broadly straight line rather than forcing the wrist sharply upward or downward. Modern mountain bike brakes are commonly arranged for one-finger braking, leaving the remaining fingers around the grip, but the brake manufacturer’s guidance and the rider’s control take priority.
Move the lever clamp inboard or outboard so the index finger reaches the blade where it has useful leverage. Do not place the lever against the grip simply because it looks tidy. Position shifters, dropper remotes and other controls so they can be operated without releasing the grip or creating accidental interference.
After adjusting reach, confirm that the lever cannot pull into the fingers or handlebar before adequate braking force is produced. Reach adjustment and bite-point adjustment are different functions; consult the brake manual for the specific model.
A practical order for setting up a mountain bike cockpit
Avoid changing everything at once. Use this sequence so each adjustment produces useful feedback:
- Establish a baseline.Record stem position, spacers, handlebar markings, width, grip diameter and control positions.
- Confirm compatibility and condition.Check clamp diameters, approved widths, torque requirements and inspect the bar, stem, grips and steerer for damage.
- Set headset preload and align the stem.Remove play without overtightening the bearings, align the stem with the front wheel and tighten the steerer clamp correctly.
- Choose the broad hand height.Use approved spacer placement and the bar’s rise to create a sensible neutral position.
- Centre and roll the handlebar.Begin at the neutral markings, then make small rotational changes to improve wrist and elbow alignment.
- Test width before cutting.Move controls inward and trial a narrower position safely. Trim only after repeated testing.
- Fit and align the grips.Seat them fully, rotate their support surfaces correctly and tighten lockrings to specification.
- Position brake levers and controls.Set lever angle, inboard position and reach for secure one-finger access where appropriate.
- Test on a familiar trail.Include climbing, flat turns, steep ground, braking and rough sections.
- Change one variable at a time.Record each change and judge it over more than one isolated corner.
Diagnosing common cockpit problems
The best cockpit is the one you stop thinking about
A successful cockpit does not demand attention on every section of trail. It allows the rider to keep a relaxed grip, steer precisely, brake without disturbing the wrist and move around the bike without feeling trapped by the controls.
Stem length establishes the relationship to the steering axis. Handlebar width, rise, sweep and roll place the hands in space. Grips define how those hands are supported and connected. Set them as one system, make small changes and use repeated trail feedback rather than fashion or a single measurement as the final judge.
When the setup is right, the stem, handlebar and grips effectively disappear—and the rider is free to concentrate on the line ahead.


GCS Cockpit Bundle
Choose your GCS handlebars and stem, and get a free set of GCS grips. Configure the colours and sizes to suit your build.
Vital MTB reviews the PEMBREE D3A flat pedal